Click System Flooring Installation Guide
- INTRODUCTION
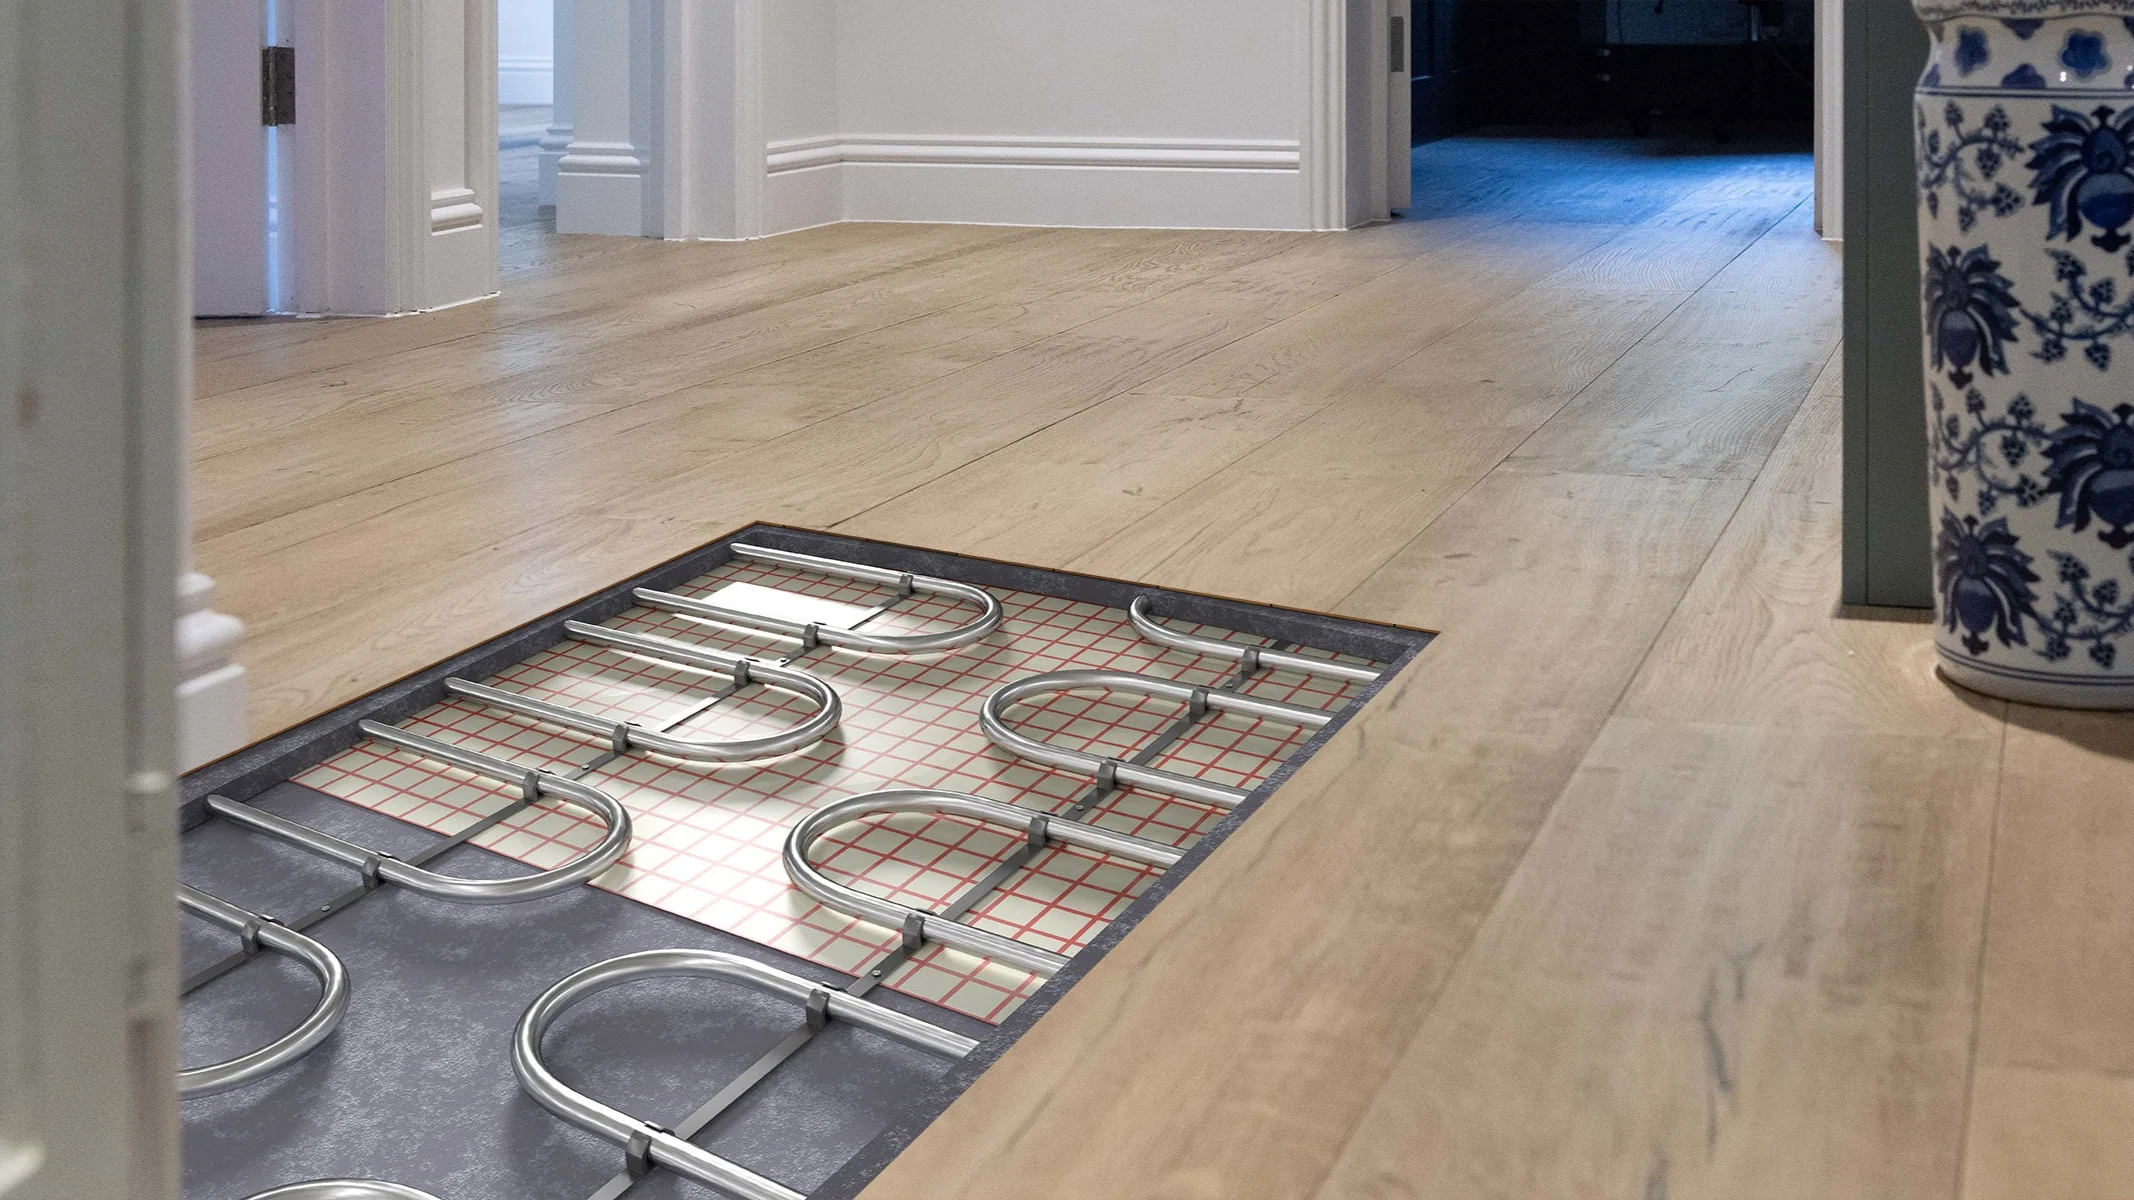
Wood material acts after the surrounding climate, the main factor is the relative humidity (RH, %). High humidity means the wood – expands; low humidity – it shrinks. So also all your furniture and all wooden floors. Due to this natural property you must attend to the instructions below.
- SUB-FLOOR PREPARATION
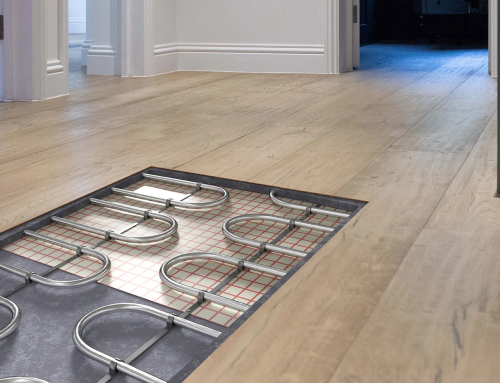
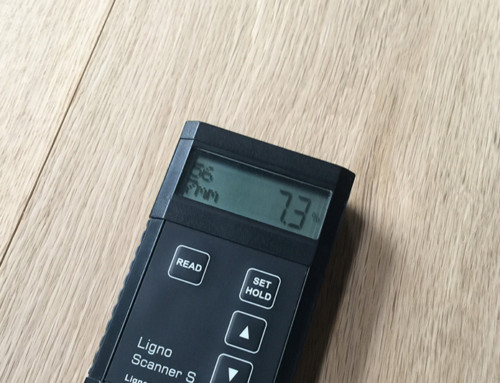
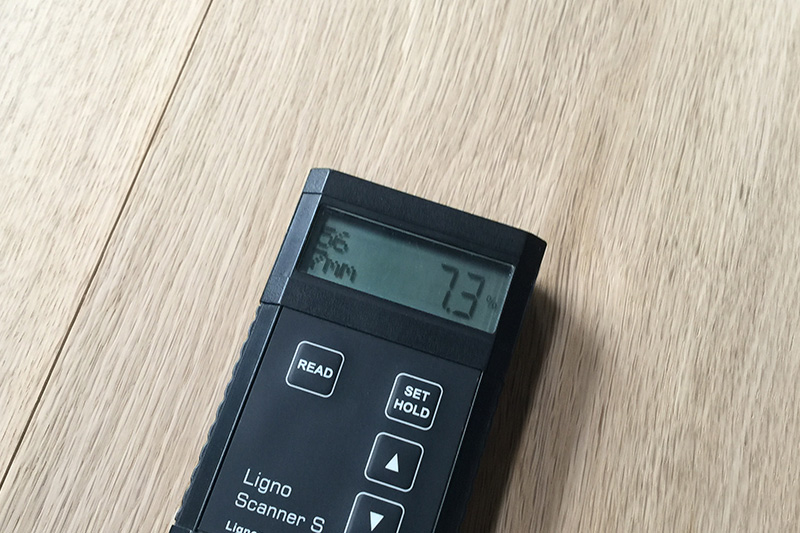
- The sub-floor must be completely dry. A new concrete slab will usually take 90 to 150 days to dry thoroughly depending on size of slab and weather conditions. The moisture content difference should be no more than 4% between the engineered wood floor and concrete sub floor.
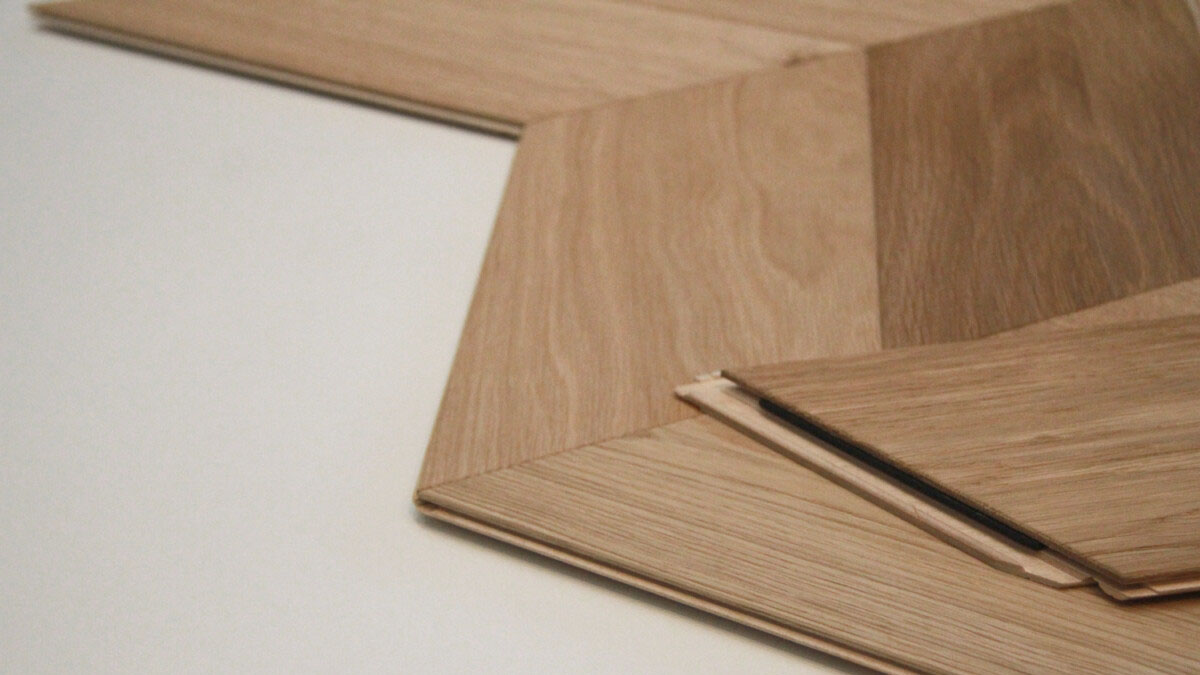
- If plywood is used as a sub-floor, the moisture content difference should be no more than 4% between engineered wood floor and plywood sub floor. Plywood size for sub-floor is suggested to be ¾” x 48” x 48” and leave ¼” between sheets for expansion.
- The sub floor must be free from any type of paint, oil, greases, dust and all other types of residues.
- The sub floor should be level. The level drop must be no more than ¼” over a 10 feet distance.
- Checklist – Top 8.
You find additional information to each section further below:
- Store the packages in the future room climate and open package after package when you install.
- This floor will be floating installed,
i.e. keep always a distance to all fixed construction parts.
- Check your floor construction
it must be dry (measure always!), clean, firm and even,
eliminate always wall to wall carpets and investigate the floor.
- Choose underlay materials (read carefully below!) according to your own situation – all floors are unique!
- Measure the room, decide installation direction
Note the limitations as per below – due to natural behavior of wood!
- Check you floor continuously during the installation
Installed defect boards can easily be replaced – cannot be complainted!
- Keep always the right room climate 45-60 % RH at 18-24 °C.
- Maintain/clean your FLOOR correct and you will enjoy the floor.
- FLOOR INSTALLATION
Your floor is made to be installed floating without glue:
- Begin laying in the left-hand corner. Place the floorboard 4-6mm from the left wall. The distance to the wall in front (4-6mm) is not important because the flooring can be pushed into place at a later stage.
- Press the end section of the next floorboard at an angle to the first one, then lay down. Complete the first row in the same matter.
- Place the final floorboard face down and the short side without the locking strip towards the wall. The distance to the wall should be 4-6mm. Mark where the floorboard is to be cut.
- Place the floorboard face down on the work surface and cut to size using a pad under 1 saw. Use a fine toothed type if you are using a hand saw. In this case, cut the floorboards face up.
- Use a cut piece of board from the previous row to start the next row. This must be at least 30 cm long. If the piece is too short, start with a new board, cut in half. Always ensure that the end joints are staggered at least 30 cm.
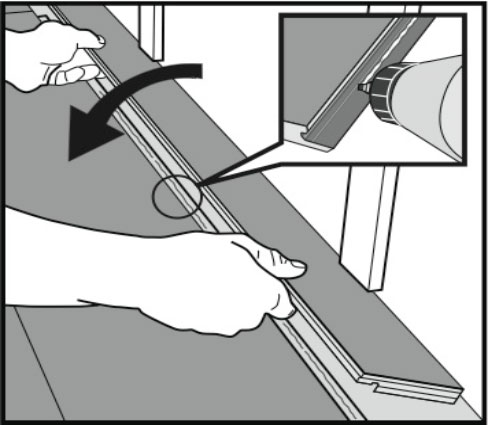
- Place the floorboard at an angle against the floorboard in the previous row, press forward and fold down at the same time.
- Place the next floorboard at an angle against the previous installed floorboard and push it against the row in front. Put it down when the floorboards are positioned tightly.
- The distance to the walls can be adjusted when three rows are completed. Place the flooring 4-6mm from the walls.
Detailed installation procedures as shown below:
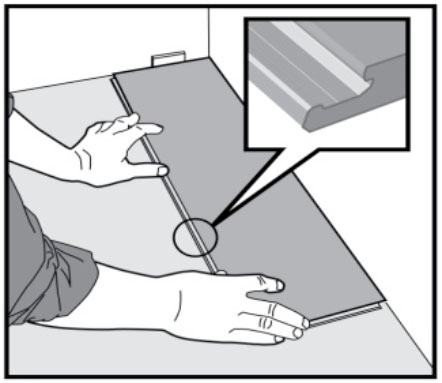
Figure 1.
First plank, first row.
Tongue side against the wall, groove side facing out.
Later, after the third row is installed, you can easily position the flooring against the front wall with a distance of approximately 1/2”.
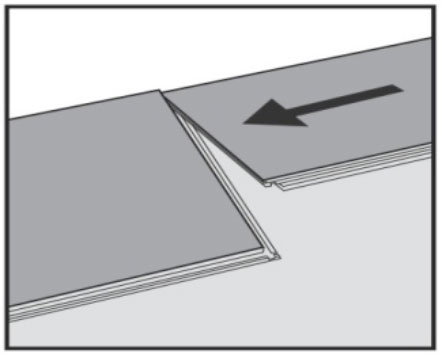
Figure 2.
Second plank, first row.
Place this plank tight to the short end of the first one.

Figure 3.
Fold down with a single movement.
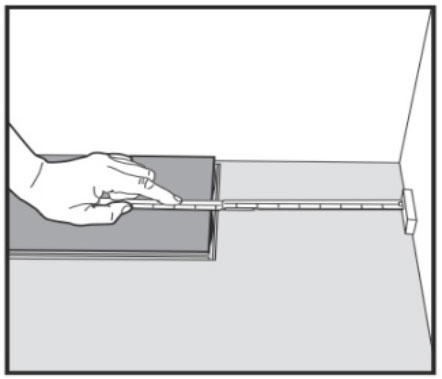
Figure 4.
At the end of the first row, cut the board to fit the remaining length. If the leftover piece is 12” or longer, use it to start the next row. Otherwise, use a pre-cut board, packaged with the flooring, to start the next row. Insert 1/2” spacers.
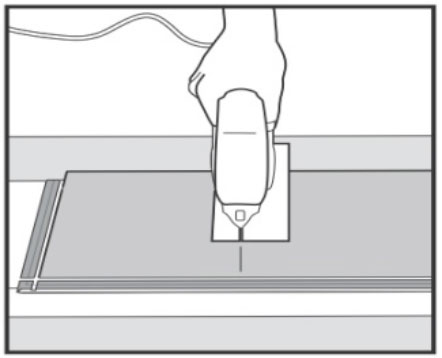
Figure 5.
Cut with a jigsaw face-down, or cut with a hand saw face-up.
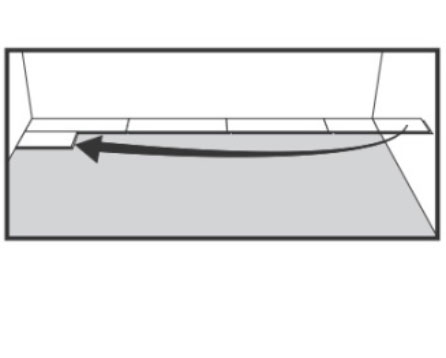
Figure 6.
Second row.
Stagger end joints of adjacent rows a minimum of 12”. Once three rows have been installed, re-check the spacers to ensure that they are tight against the wall. Adjust, if necessary, to ensure the installation is square.
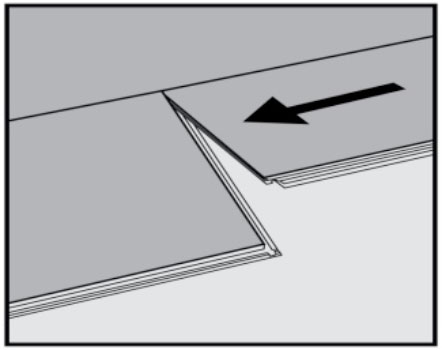
Figure 7.
General; distances between short ends.
Minimum distance between short ends of planks in parallel rows should be 12”.
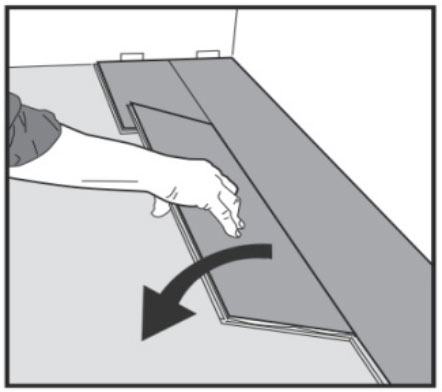
Figure 8.
Second plank, second row.
Place the panel tight to the short end of the previous panel and fold down in a single movement.
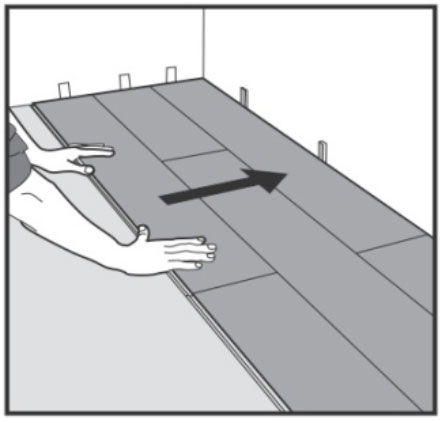
Figure 9.
After 3 rows.
Re-check the spacers to ensure that they are tight against the wall. If necessary, adjust the floor to ensure the installation is square.
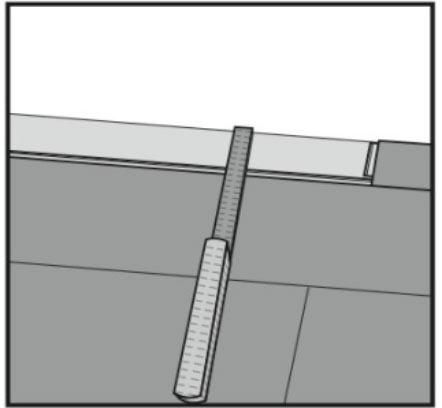
Figure 10.
Last and/or first row.
Allow for proper expansion against the wall or any vertical surface. The last row will need to be cut to the necessary width (2’ or wider).
Cut the panels length-wise and glue the narrow boards to the adjoining full row.
For panels narrower than 2”
Last and/or first row.
Join panels at their ends by gluing the joint with floating floor adhesive.
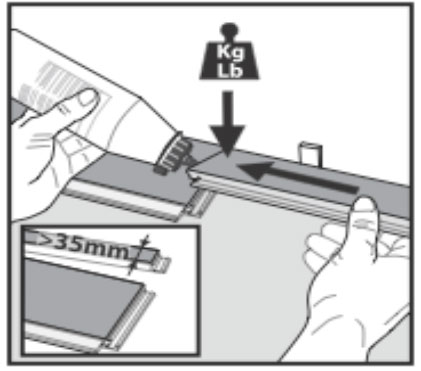
Last row or under cabinets

Cut off the locking element with a chisel and use floating floor adhesive on the adjusted strip; push the planks horizontally together.
If necessary, put some distance between the last panel and the wall in order to keep the planks together during the curing time of the glue.
E. AFTER THE INSTALLATION
Room climate – humidifier or de-humidifier needed ?
At all times, the recommended room relative humidity (RH) of 40-60 % and temperature of 18-24 °C should be kept. If necessary install a humidifier/dehumidifier to ensure the best climate for yourself , furniture and your floor. If the climate is not kept or the floor is not correct installed, by natural properties the floor can show fine gaps or sound can be noticed. At dry climate (low RH %) concave or cupping boards or at wet climate (high RH%) convex boards can be noticed.
Cleaning and maintenance
The floor should be cleaned by using a vacuum-cleaner (attachment for wood floors) or brushed. If required, wipe with a damp-dry (well squeezed) cloth. Use a mild soap or similar. Any water spilt accidentally must be wiped off immediately.
Floor protection furniture, entrances
Stick felt pads to chair and other pieces of furniture legs. Place doormats at out door entrances.
